Experiment 7: ATX Computer Power Supply Conversion
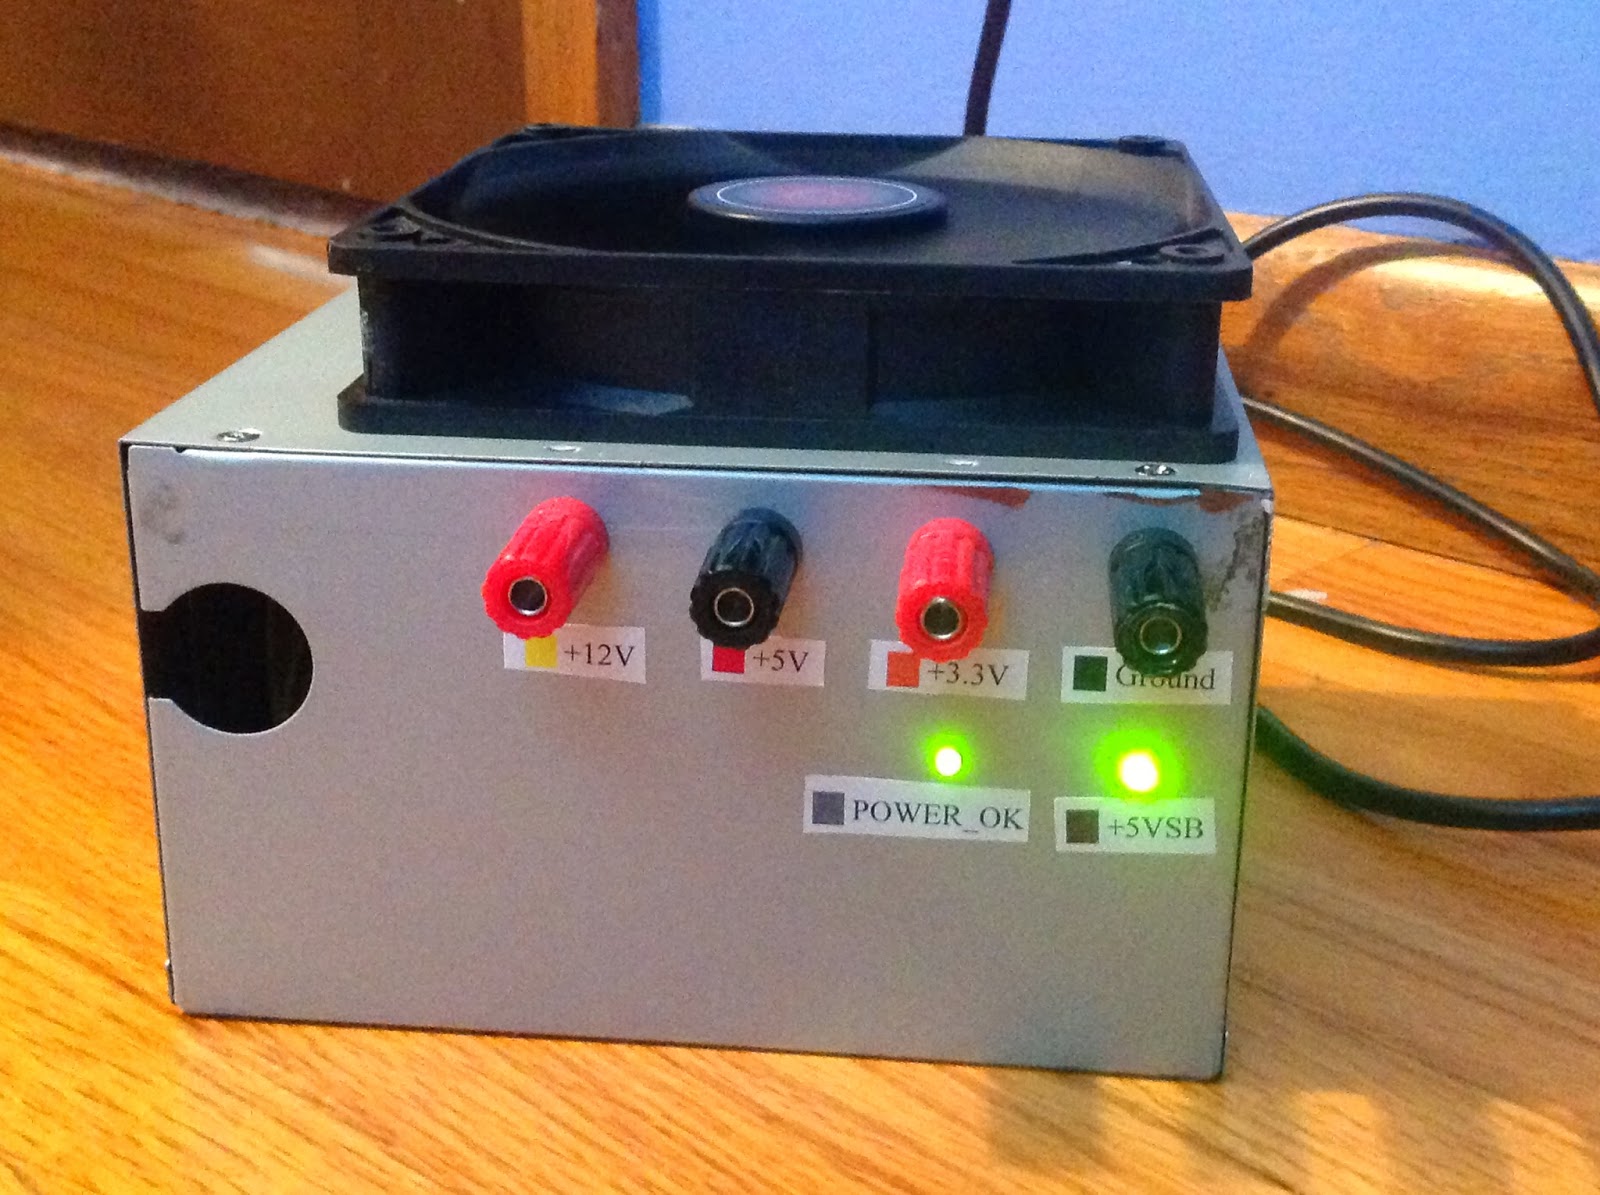
As I said before, I purchased an ATX power supply unit for Experiment 1: Hard Drive Sander. I have been in need of a good lab power supply for multiple experiments, so I decided to modify that computer power supply to make it into a lab power supply. First, I unscrewed the case and unplugged the fan connector from the PCB inside to give better access to all the wires. Then, I chopped off all the computer connectors at the ends of the wires and grouped the wires all together by color. I drilled some holes for binding posts in the side of the PSU and two more holes for LEDs. After I installed the binding posts, I soldered all the black (ground) wires to one post, all the orange (3.3V) wires to another, all the red (5V) wires to another, and all the yellow (12V) wires to yet another binding post. Having done so, I connected the green wire, which normally goes to the front switch on a computer, to the ground so that the power supply would power on when I flipped the switch at the back. The green wire must be connected to the black to turn on the PSU. Also, the brown 3.3V sense wire must be connected to the orange 3.3V terminal. My supply had a blue -12V wire and a white -5V wire, but the binding posts I used were ridiculously expensive, so I opted to not connect those wires to binding posts and ended up leaving them inside the supply. I hooked up the purple (+5VSB) wire to an LED and then to ground using a 330 Ohm resistor in the middle. The purple wire outputs +5V if the power supply is switched on and connected to an outlet. My last connection was the grey (POWER_OK) wire to an LED and ground with another 330 Ohm resistor. The POWER_OK signal is low, or off, if the supply begins to give bad voltages. That way computer processors can turn off before they are damaged by incorrect voltages. I basically used the +5VSB and POWER_OK LEDs to show me if the supply was connected and on, and if it was supplying the correct voltages. To finish everything off, I plugged in the fan connector again and the screwed the supply's lid back on, this time leaving the fan on top of the case because there was no space inside. I measured the voltages and everything was correct and stable to +/- 0.01V, so the modification passed! I later added nice labels. Here is the finished lab power supply: