Experiment 8: Electrolytic Rust Removal
Electrolytic rust removal is very helpful for removing rust from ferrous objects, as it does not damage the underlying metal and is quite a good "lazy" method. I had some rusty railroad spikes (no, I did not steal them from an active railroad - October Sky), so I tried this method on them using my lab power supply from Experiment 7: ATX Computer Power Supply Conversion. To actually remove the rust from the spikes, I poured one gallon of water and one tablespoon of washing soda (not baking soda or baking powder) into a bucket and stirred. For my anode, which connected to the +12V terminal and is eventually eroded away, I used a flattened out wall of a steel soup can. The cathode, which the rust is removed from, was obviously my railroad spike. After I connected the +12V and GROUND terminals, I made sure that the leads got good connections to the electrodes by testing for a voltage drop with my voltmeter. The voltage should drop if the electrolysis is actually running. Every so often I turned the spike around to ensure that the anode had a good "line of sight" to all the surfaces. Note that while it is fine for the black GROUND wire to be submerged, you will destroy your positive lead if you submerge it. Once I saw that all the corrosion on the spike had turned black, I took it out of the bucket and scrubbed it off with a bristle brush. After that, I washed it with hot water to warm the piece, and after drying it with towel, let the stored heat dry off the residual water. I got some very nice results, so here are the before and after pictures:
Experiment 7: ATX Computer Power Supply Conversion
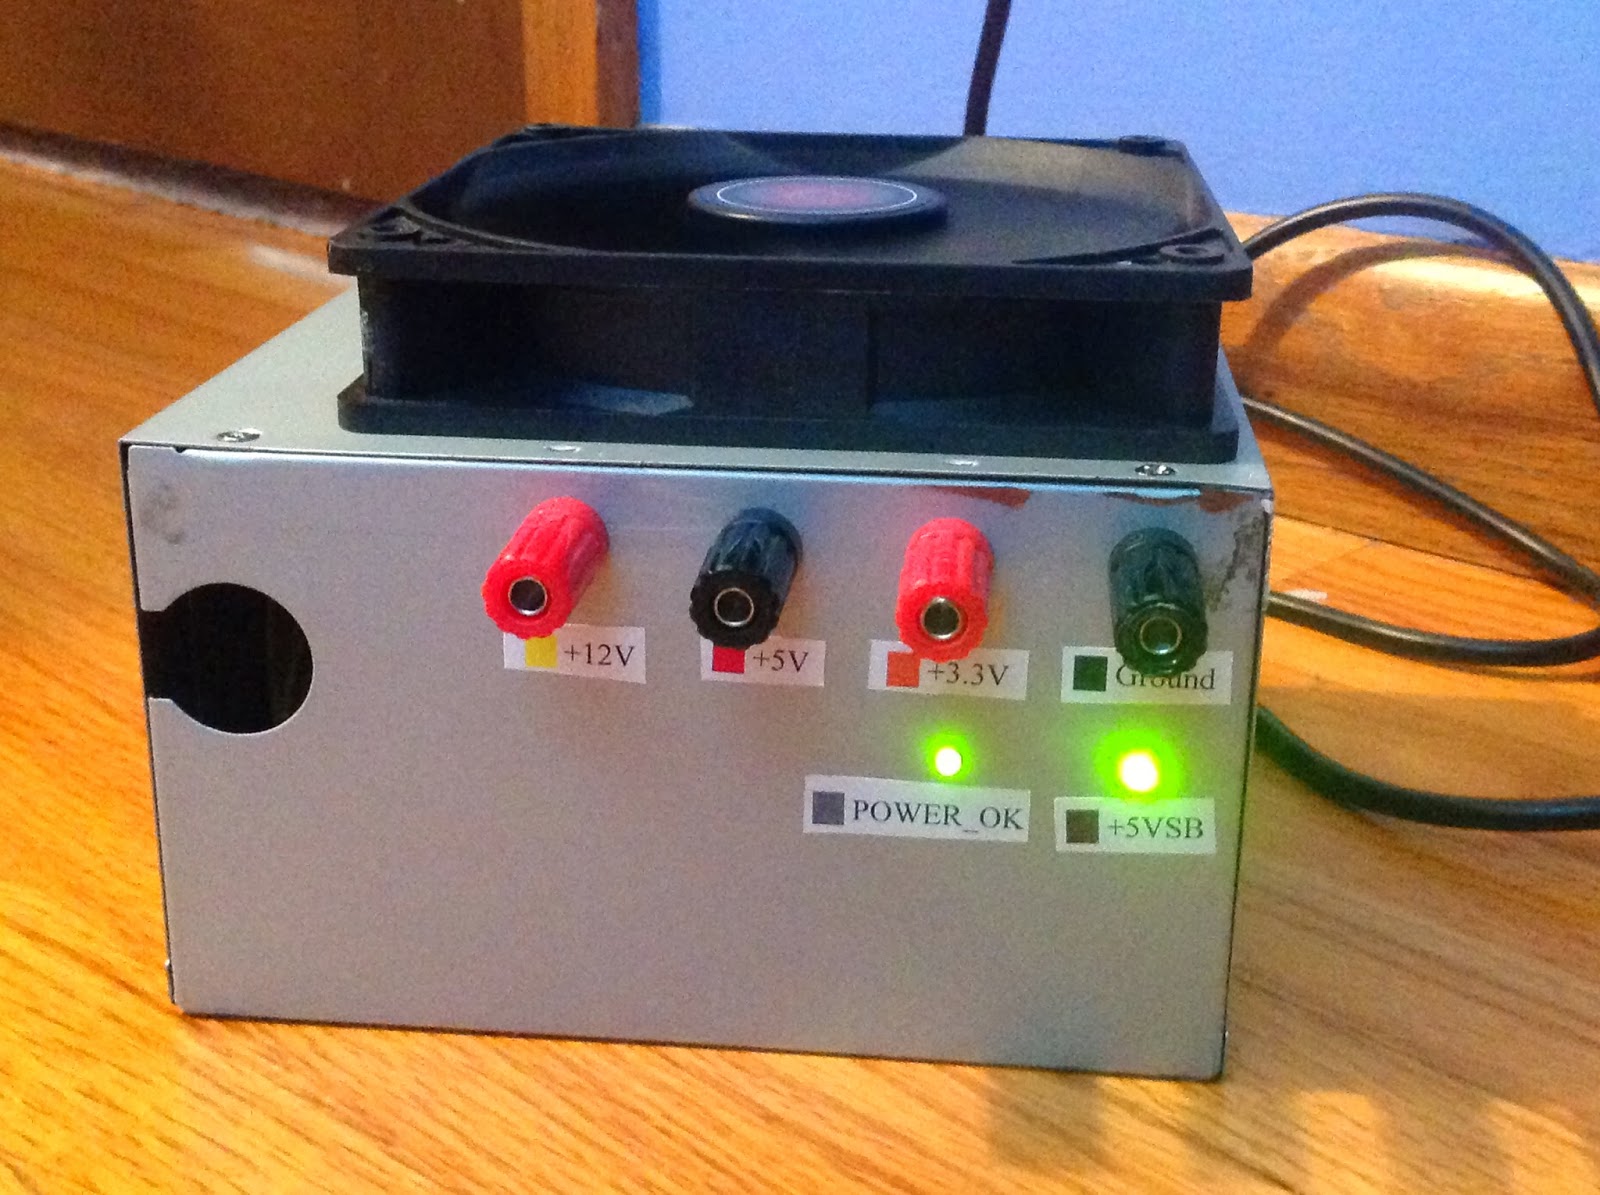
As I said before, I purchased an ATX power supply unit for Experiment 1: Hard Drive Sander. I have been in need of a good lab power supply for multiple experiments, so I decided to modify that computer power supply to make it into a lab power supply. First, I unscrewed the case and unplugged the fan connector from the PCB inside to give better access to all the wires. Then, I chopped off all the computer connectors at the ends of the wires and grouped the wires all together by color. I drilled some holes for binding posts in the side of the PSU and two more holes for LEDs. After I installed the binding posts, I soldered all the black (ground) wires to one post, all the orange (3.3V) wires to another, all the red (5V) wires to another, and all the yellow (12V) wires to yet another binding post. Having done so, I connected the green wire, which normally goes to the front switch on a computer, to the ground so that the power supply would power on when I flipped the switch at the back. The green wire must be connected to the black to turn on the PSU. Also, the brown 3.3V sense wire must be connected to the orange 3.3V terminal. My supply had a blue -12V wire and a white -5V wire, but the binding posts I used were ridiculously expensive, so I opted to not connect those wires to binding posts and ended up leaving them inside the supply. I hooked up the purple (+5VSB) wire to an LED and then to ground using a 330 Ohm resistor in the middle. The purple wire outputs +5V if the power supply is switched on and connected to an outlet. My last connection was the grey (POWER_OK) wire to an LED and ground with another 330 Ohm resistor. The POWER_OK signal is low, or off, if the supply begins to give bad voltages. That way computer processors can turn off before they are damaged by incorrect voltages. I basically used the +5VSB and POWER_OK LEDs to show me if the supply was connected and on, and if it was supplying the correct voltages. To finish everything off, I plugged in the fan connector again and the screwed the supply's lid back on, this time leaving the fan on top of the case because there was no space inside. I measured the voltages and everything was correct and stable to +/- 0.01V, so the modification passed! I later added nice labels. Here is the finished lab power supply:
Update to Experiment 1: Hard Drive Sander
As I said in a previous post, I ripped apart an old hard drive and made it into a disk sander. My power supply for that sander finally arrived! I tried plugging the sander in and then plugging the PSU into the wall while its switch was on, but nothing happened. After some frantic hair-pulling trying to figure out if the supply was dead, I found a solution on the Internet. PSUs need a signal from the motherboard to actually turn on, even if they are plugged in, so jumping the green wire to a black wire on the motherboard connector fakes that signal. I tried this, and amazingly, the HDD spun up and became a high-speed sander! I was able to nicely sharpen a railroad spike into a chisel for chopping stuff. I also sharpened a wooden dowel into a conical point and gave a regular pencil an unnaturally sharp point. I noticed that after 2 minutes, the HDD spontaneously shut down. The PSU's fan still was spinning, but the HDD consistently shut down. However, I can cycle the supply by flipping the switch on and then off to fix the problem. I believe that the HDD figures out that there are no signals from the motherboard and then decides to shut off.
Experiment 6: Hot Ice
In traversing the wide Information Superhighway, I found NurdRage's very neat hot ice video. I used his homemade method and used 1 liter of clear vineagar to 3 tablespoons of baking soda. His method worked very well. When I boiled it down, I did not notice a floating crust but rather a quick-forming rim of crystal around the pot. Once I saw that (it took a while), I immediately took the sodium acetate trihydrate (the end result) off the stove and cooled it in the refrigerator. When I stuck my finger in to see if it was cold, it froze! I was happy that I had made it work on the first try. After I microwaved it for 30 seconds and cooled it again, I placed a crystal of the sodium acetate trihydrate in and it froze very nicely and beautifully. My solution actually turned out to be quite clear. The experiment gave a warm feeling of satisfaction and was also quite warm physically, due to the exothermic freezing reaction.
Experiment 5: 9V Battery Clips
Cool little thing I discovered - by peeling the casing back on a 9V battery, one can salvage a clip for connecting other 9V batteries to circuits - sort of like battery clips commercially available. I did this by carefully twisting and rolling the metal case away to reveal the six small batteries inside the larger 9 volt. The little terminal tab at the top popped out, and I was able to solder wires on to the backside, like so:
As you can see, it is just the top of a dismantled 9V battery with wires soldered to the back, but it works quite well for attaching power to circuits.
Experiment 4: Carbon Rods
If you want to do electrolysis to make sodium hydroxide or do other stuff, carbon rods are sometimes used as electrodes, but burning pencils to get their rods only gives thin, easily breakable clay containing pencil leads (I did that). If you have a battery (like a AA or D-cell) that says "Heavy Duty" or "Super Duty", it probably has a carbon rod inside. I took apart a heavy duty AA and peeled apart the positive side to reveal the carbon rod. I carefully removed the sides of the battery and got out the rod. Then I washed it up to remove the weird black stuff that surrounded the rod. By the way, the carbon rod is in the center, not on the sides. However, it turns out that I need a membrane to electrolyze aqueous sodium chloride into sodium hydroxide, so I will not be getting there quite yet.
Experiment 3: Zinc Ring Casting
The image at the top of the post is the newly removed casting. I cleaned it up with a Dremel tool and a hand file and then sanded it smooth. As you can see from the two other pictures, the ring actually resembles a real ring and looks fairly nice for a first casting. It even fits on a finger and does not irritate the wearer!
Experiment 2: Lithium Battery
Lithium is an alkali metal, which means that it is fairly reactive with water and air. Some batteries have lithium in them, so following NurdRage's tutorial, I set about extracting lithium from batteries. First I remembered that some coin batteries say "Lithium", so I found two of those with the word "Lithium" printed on them. I took one apart and dumped a metal mesh that I thought was lithium into some cooking oil to keep it from oxidizing with the air. I then dumped the rest of the battery into some water and it fizzed. Thus I learned that the mesh was not lithium; the other part was. With the second battery, I was more careful and found some reddish stuff on the inside of one of the polarities and isolated that in the oil. When placed in water, this reacted quite well. However, I breathed and then started coughing. Later, I found a battery pack that had two AAs in it that were lithium. These were the type NurdRage took apart. I unwrapped one of them and found a nice roll of lithium. I placed that under the oil and reacted a small part with water. Fizz!!! Once again, I breathed and then commenced coughing. To remove the irritant, I opened some windows and blew the air out with a fan. From my dad's research (he is a chemist), we decided that the irritant gas is probably hydroxide, so if you react some lithium, you may want to be wary of that.
Experiment 1: Hard Drive Sander
This experiment basically turns a Hard Drive Disk into a Disc Sander. I had an old 160 gig hard drive that frustratingly did not work, so I took it apart. I had originally considered making a mold and casting my own Torx screwdriver in metal to undo the uncommon screws, but I found a Torx head that fit, so I did not have to cast my own. If you make a HDD sander, excercise patience when removing the components, because I am sure you do not want to break the important stuff like the motor. I left the motor and platters intact and then rearranged the platters so that they were directly on top of each other, as to add more support. I cut some sandpaper to be the right size and then sandwiched that between the top platter and the washer on top of the platters that held the stack down. I tested the sander (before it had sandpaper on it) with a PSU I already had and the platters spun up, so I must have the right kind of "dumb" drive, one that spins up just by plugging into the PSU Molex connector. I will be purchasing another PSU to act as a permanent power supply. When I get that and hone some blades, I will make an update!
Intro to Experimentation
Hey Reader!
This post is the intro to many others- I have decided to record all my mad experimentations for all to see. I am doing this for a number of reasons:
- The Information Superhighway has too many unanswered questions that go nowhere. I am not going nowhere with these posts.
- Who knows if the writer of the tutorial you were reading didn't actually do the experiment? I certify that I have done all these.
- I need to get this info out for others to use! In line with the maker spirit, share knowledge!
Have fun reading, and only use as much caution as you are comfortable with.
Subscribe to:
Posts (Atom)