This actually happened a while ago but I just got around to posting the video. I used a small cast iron skillet as a mold to make an aluminum skillet from melted-down vacuum cleaner parts. Amazing! A cast vacuum cleaner from the 1960s becomes a fully functional skillet useful for camping or making eggs.
I thought it would be helpful to explain how to do metal casting rather than only showing the pouring of the molten aluminum, so there are tips throughout the video aimed at those beginning casting.
Showing posts with label metal casting. Show all posts
Showing posts with label metal casting. Show all posts
Casting a 3D Aluminum Puzzle Cube
 As I was searching for another casting project to hone my skills on, my eyes fell upon an injection-molded 3D puzzle cube made by Proto Labs. The cube had nine plastic parts that all fit together to make the cube. It fit the bill for an interesting casting project, so I started by planning out how each piece would be oriented in the casting flask. I wanted to be able to pull them straight out of the sand without having undercuts. The plastic parts were hollow with one side missing, so I had to put tape over the missing side so that I would cast solid aluminum parts.
 After all the pieces were taped, I laid them in a circle in my casting flask. I positioned them close together so that the aluminum would only have to travel a short distance to fill the mold. Then, I dusted the parts in baby powder and sprinkled on casting sand, packing as I went. To make the other half of the mold, I first flipped the initial mold half over and then cut away sand that had gotten under the yellow piece. The yellow piece was tricky because it had an overhang/undercut in all orientations. Thus, I had to cut away the sand under the overhang so that I could later pull the piece straight out of the mold.
 With the first half complete, I dusted everything with baby powder again and then packed sand into the second half of the mold, which fit on the first half with wooden pegs. When both casting flasks were finished, I pried the halves apart and carefully teased the pieces free from the sand. I then cut a sprue and gate system to feed metal to the pieces. The sprue and gate system should have rounded corners as much as possible to minimize sand erosion by molten aluminum. I did not make any vents for the casting, as the pieces were fairly small.
 Outside, I melted a full crucible of aluminum and heated it for three minutes after the last piece of scrap melted to bring it up to pouring temperature. Then, I sprinkled sodium carbonate and sodium chloride on in a 50/50 ratio and scraped off the dross/flux mix. I poured the shiny liquid aluminum down the sprue, and half an hour later, I broke open the mold to reveal a casting that looked somewhat like an ancient Mayan symbol.
Using a hacksaw with a metal blade, I cut each piece free from its gate and began filing. Injection molding is quite different from sand casting, so the pieces weren't designed to be sand cast, and they were fairly rough straight from the mold. My strategy for filing them was to file two pieces until they fit together and then file additional pieces to fit the previously filed ones. I began with the orange and red pieces and ended with the green piece, since it holds the cube together. I found that filing the edges and corners of the pieces greatly improved the cube's appearance, so I did that, using a Dremel tool to get in the hard-to-reach corners. In total, I filed for 12 hours. It was quite awful.
 When all the pieces fit, I sanded them with progressively finer grits to remove the scratch marks left from filing and sanding. I finished by sanding everything with a worn-out sanding sponge, which gave the cube a nice shine. When looked at from a corner, the cube appears to be a 3D maze, which I think is pretty neat. Although the cube was a lot of work and took an obscene amount of filing to finish, it was well worth it in the end. Nothing worthwhile is ever easy... still, I'm never doing this much filing again!
Experiment 57: Microwave Furnace Melting Metal

 To make my microwave furnace, I grabbed the alumina-silica light-density firebrick that was my arc furnace body and cleaned the metal residue from its inside. The furnace body is simply one brick with a 2" diameter hole 1.5" deep in it and another brick as the lid. Each brick is about 4" by 4" by 2.5", so this leaves a 1" thick bottom on the furnace body.
I added a 1/8" layer of crushed lump charcoal to the bottom of the furnace's inside and put my soup can crucible on top of that. Then, I added some aluminum TIG welding filler rod scraps and set the furnace in an experiments-only microwave. With everything in place, I nuked my furnace for six minutes on high heat. Amazingly, the aluminum was completely molten and glowed bright orange! I was quite impressed, so I tried zinc in the microwave furnace. After four minutes, it was a mere puddle.
I read on a forum somewhere that charcoal can heat things to at least 1000°C as a microwave susceptor, so I suppose I shouldn't be surprised that the furnace works so well. With a simple soup can as its crucible, though, it has limitations. I tried melting copper, and while the copper melted (around 20 minutes on high), it also ate through the steel and leaked out everywhere. A graphite crucible might be a better choice. However, I am still impressed that a common microwave can melt a metal like aluminum in less than ten minutes!
Experiment 55: Fresnel Lens Solar Death Ray!
A very long time ago, one of my friends introduced me to The King of Random's videos on YouTube. I was impressed, and it wasn't long before I found his video on making a solar death ray using a Fresnel lens from a rear projection TV and some cheap wood boards. I had to try it!
 After finding a rear projection TV on craigslist for free and just barely managing to compress it into a minivan for transport, I began searching for its Fresnel lens. The TV was absolutely enormous, and it was really heavy as well. I eventually found out how to take off the lens and carefully set it aside so it wouldn't get scratched. Other useful things I found in the TV were castor wheels (used in my ball mill), mirrors (CO2 laser, perhaps?), and various circuit boards and lenses that I haven't used yet.
 The Fresnel lens itself is quite floppy, and it is also large and unwieldy, which isn't good. The King of Random's video showed how to build a nice frame for the lens that held it rigidly but still allowed for easy rotation to follow the sun. I followed his instructions closely, and the frame turned out to be inexpensive and very helpful. I also used this Instructable to find the lens focal length so I knew where to put objects for best burning performance. My death ray's focal length is about 35". I put a board across the two cross-pieces on the frame so that objects can rest there at a fixed distance from the lens (instead of me holding them in midair). Finally, I scratched each lens side with my fingernail to find out which side had grooves on it. The grooves should face the sun for best performance. In use, I also try to line the lens up so that it is perpendicular to the sun's rays that are hitting it.
Concentrating over a square yard of sunlight into a square inch makes a very bright spot of light, which can be problematic for unprotected eyeballs. I bought some #10 shade cheap-o welding goggles from Harbor Freight and use them every time I play with the death ray. It is impossible to see what is happening otherwise, although my iPad can see details inside the bright spot.
 I love using my Fresnel lens. It creates a searing-hot spot of intensely focused sunlight, capable of melting or burning many things. Over the years, I have melted over a quarter's worth of zinc pennies using this Fresnel lens. Yes, melting metal with sunlight! While this lens cannot melt iron or rocks as some videos show, I have melted and compressed HDPE milk jug shreds into a usable billet by placing them in a soup can "oven" under the death ray spot. My Fresnel lens has even burnt all the way through inch-thick wood boards! This death ray cost less than $20 to make and uses freely available energy to do incredibly destructive things, which is exactly why I love it!
 After finding a rear projection TV on craigslist for free and just barely managing to compress it into a minivan for transport, I began searching for its Fresnel lens. The TV was absolutely enormous, and it was really heavy as well. I eventually found out how to take off the lens and carefully set it aside so it wouldn't get scratched. Other useful things I found in the TV were castor wheels (used in my ball mill), mirrors (CO2 laser, perhaps?), and various circuit boards and lenses that I haven't used yet.
 The Fresnel lens itself is quite floppy, and it is also large and unwieldy, which isn't good. The King of Random's video showed how to build a nice frame for the lens that held it rigidly but still allowed for easy rotation to follow the sun. I followed his instructions closely, and the frame turned out to be inexpensive and very helpful. I also used this Instructable to find the lens focal length so I knew where to put objects for best burning performance. My death ray's focal length is about 35". I put a board across the two cross-pieces on the frame so that objects can rest there at a fixed distance from the lens (instead of me holding them in midair). Finally, I scratched each lens side with my fingernail to find out which side had grooves on it. The grooves should face the sun for best performance. In use, I also try to line the lens up so that it is perpendicular to the sun's rays that are hitting it.
Concentrating over a square yard of sunlight into a square inch makes a very bright spot of light, which can be problematic for unprotected eyeballs. I bought some #10 shade cheap-o welding goggles from Harbor Freight and use them every time I play with the death ray. It is impossible to see what is happening otherwise, although my iPad can see details inside the bright spot.
 I love using my Fresnel lens. It creates a searing-hot spot of intensely focused sunlight, capable of melting or burning many things. Over the years, I have melted over a quarter's worth of zinc pennies using this Fresnel lens. Yes, melting metal with sunlight! While this lens cannot melt iron or rocks as some videos show, I have melted and compressed HDPE milk jug shreds into a usable billet by placing them in a soup can "oven" under the death ray spot. My Fresnel lens has even burnt all the way through inch-thick wood boards! This death ray cost less than $20 to make and uses freely available energy to do incredibly destructive things, which is exactly why I love it!
Experiment 51: Electric Resistance Furnace
Electric resistance furnaces differ from electric arc furnaces (like the one I made in Experiment 32) in that they use resistive heating (like a toaster) instead of giant lightning bolts to melt metal. I had a hotplate that died (because a container holding hot sodium hydroxide solution broke on it), so I decided to use its heating elements to make a small furnace.
First, I played with the resistance wire to see what sort of current made it glow. I found that 12 volts made a 7" piece glow red hot. However, it didn't melt the wire, which was good. I calculated the current using Ohm's law and determined how much wire I would need to use to get the same current at 120 volts. Actually, the math is pretty simple--I needed to use ten times as much, or 70".

I used a hollowed-out low density soft alumina-silica firebrick as the furnace body. It had seen previous service as an arc furnace, so it was fairly beat up and I didn't care if it broke. I also used another piece of firebrick as an insulating lid. Fitting 70" of resistance wire in a 2" diameter hole was difficult, but coiling the wire seemed to work well. For connecting the mains electricity to the ends of the wire, I made clamps using small nuts and bolts that sandwhiched the wire snugly.
My crucible was a cut-off soup can bottom, and my metal of choice was aluminum. Plugging the furnace into the outlet made the heating elements glow, but the really neat thing about this furnace was that it was silent. I even read a book while I waited for my metal to melt! An hour later, I checked on the melt, and the aluminum was undoubtedly molten! I wanted to grow aluminum crystals inside a blob, so I tried pouring the molten aluminum onto some glass to insulate it better. That was a rather bad idea, because the glass exploded, and molten aluminum was dispersed about the room. Oops!


Even though the crystal growing didn't work out, I was quite impressed that aluminum could be melted silently with just some electricity! Of all the metal-melting methods I have tried (there are at least 14 of them), this is one of the quietest.
First, I played with the resistance wire to see what sort of current made it glow. I found that 12 volts made a 7" piece glow red hot. However, it didn't melt the wire, which was good. I calculated the current using Ohm's law and determined how much wire I would need to use to get the same current at 120 volts. Actually, the math is pretty simple--I needed to use ten times as much, or 70".

I used a hollowed-out low density soft alumina-silica firebrick as the furnace body. It had seen previous service as an arc furnace, so it was fairly beat up and I didn't care if it broke. I also used another piece of firebrick as an insulating lid. Fitting 70" of resistance wire in a 2" diameter hole was difficult, but coiling the wire seemed to work well. For connecting the mains electricity to the ends of the wire, I made clamps using small nuts and bolts that sandwhiched the wire snugly.
My crucible was a cut-off soup can bottom, and my metal of choice was aluminum. Plugging the furnace into the outlet made the heating elements glow, but the really neat thing about this furnace was that it was silent. I even read a book while I waited for my metal to melt! An hour later, I checked on the melt, and the aluminum was undoubtedly molten! I wanted to grow aluminum crystals inside a blob, so I tried pouring the molten aluminum onto some glass to insulate it better. That was a rather bad idea, because the glass exploded, and molten aluminum was dispersed about the room. Oops!


Even though the crystal growing didn't work out, I was quite impressed that aluminum could be melted silently with just some electricity! Of all the metal-melting methods I have tried (there are at least 14 of them), this is one of the quietest.
Experiment 47: Metal Polishing with Toothpaste


Toothpaste is used for brushing teeth, and it works for this because it has extremely fine abrasives in it that polish your teeth. I squirted a bit of toothpaste onto my plate and then used a cloth rag to rub it around. I scrubbed until the toothpaste became grey with aluminum and then washed it off. I repeated this process for about two hours.

Finally, at the end of the laborious process of sanding and polishing, I cleaned the plate off with a toothbrush and soap to remove the minty fresh smell. After drying the plate, I was stunned to see that it was really and truly shiny! I hadn't expected a lot from the toothpaste, but it did a dazzling job of shining up the cast plate. I was quite pleased with the end result of the casting, sanding, and polishing.
Experiment 32: The Arc Furnace!
For a while, I've had the idea of building an arc furnace. When I saw The King of Random's video on building one using microwave parts, I knew it was time to act. Together, a friend and I successfully built an electric arc furnace.
This project has been fairly difficult and expensive, to be honest. At first, we got the wrong type of 8AWG wire (it was car audio wire instead of "normal" 8AWG stranded copper wire). It had very thick insulation and so I couldn't get as many turns into the transformer as the TKOR used. Thus, the furnace didn't really work. After that, we got some of the right wire and wound the transformers. This was an extremely difficult and unpleasant step. We could only fit 15 turns (rather than 18), and even at that, it was an awful experience putting the coil into the transformer. Fifteen turns seems to work fine, though.
After that was done, I had trouble getting lantern batteries for carbon electrodes. Though I will refrain from using foul language, I can only say that the recycling center I tried to get old lantern batteries from was uncooperative. My friend finally got some from a recycling center near him. We found that when extracting carbon rods from batteries, it is much easier if they are new. The manganese dioxide in old batteries becomes hard as a rock, making it difficult to get the rods out safely.
Another friend graciously gave me some alumina firebricks, which were easy to carve into the furnace. Rather than cutting two furnaces out of the brick like TKOR did, We cut the brick in half and cut the 2" hole in the middle of one half, effectively making a furnace with thicker walls. We used the other half as the lid. The idea was that once one part wears out, the roles can be switched. Another 2" hole can be cut in the lid to use as a furnace, and the bottom of the old furnace can be used as the new lid.
Having assembled all the arc furnace parts, we tested it on first zinc, then aluminum, then copper, and finally iron. The zinc melted but it also burned. This is typical of zinc. The aluminum melted nicely... too nicely. As I poured it into my aluminum muffin tin, it promptly melted right out onto the patio. I suppose I should have used steel to contain the brightly glowing aluminum.
 In the video below, I used the furnace to melt copper scrap. This worked quite well. I found that the time it takes to melt the metal is longer than what TKOR says in his video (this is probably because I used larger amounts). When molten, the copper had an amazingly shiny glowing orange surface. It looked absolutely terrific. I used my foundry sand and a new, shorter casting flask to cast a neat little Cu tile for my element collection. After some cleaning up, it turned out very well.
 Regrettably, after the copper melt, the furnace broke in half! There was only one crack, but it ran down the full furnace height, making it unsafe for use. I quickly turned the lid into a furnace and then used the broken furnace as the new lid. Once the swap was complete, I melted some iron/steel. It took about six minutes, and I should have gone longer, but the vice grip electrode holders were becoming too hot to hold, even with fireproof gloves. I tried to pour the molten iron into my Fe tile mold, but as I picked up the furnace, the radiant heat promptly burned me through the fireproof leather gloves! I only managed to get a tiny bit of iron into the mold, but I undoubtedly cast iron! For me, it was quite an achievement, given that I have only cast aluminum and copper until now. The rest of the iron froze in the furnace, so I will have to remelt it to get it out.
I am quite pleased with the results (Cu tile, achievement of casting iron), except for the broken furnace and the failed iron pour. I learned a few good lessons from the experience:
This project has been fairly difficult and expensive, to be honest. At first, we got the wrong type of 8AWG wire (it was car audio wire instead of "normal" 8AWG stranded copper wire). It had very thick insulation and so I couldn't get as many turns into the transformer as the TKOR used. Thus, the furnace didn't really work. After that, we got some of the right wire and wound the transformers. This was an extremely difficult and unpleasant step. We could only fit 15 turns (rather than 18), and even at that, it was an awful experience putting the coil into the transformer. Fifteen turns seems to work fine, though.
After that was done, I had trouble getting lantern batteries for carbon electrodes. Though I will refrain from using foul language, I can only say that the recycling center I tried to get old lantern batteries from was uncooperative. My friend finally got some from a recycling center near him. We found that when extracting carbon rods from batteries, it is much easier if they are new. The manganese dioxide in old batteries becomes hard as a rock, making it difficult to get the rods out safely.
Another friend graciously gave me some alumina firebricks, which were easy to carve into the furnace. Rather than cutting two furnaces out of the brick like TKOR did, We cut the brick in half and cut the 2" hole in the middle of one half, effectively making a furnace with thicker walls. We used the other half as the lid. The idea was that once one part wears out, the roles can be switched. Another 2" hole can be cut in the lid to use as a furnace, and the bottom of the old furnace can be used as the new lid.
Having assembled all the arc furnace parts, we tested it on first zinc, then aluminum, then copper, and finally iron. The zinc melted but it also burned. This is typical of zinc. The aluminum melted nicely... too nicely. As I poured it into my aluminum muffin tin, it promptly melted right out onto the patio. I suppose I should have used steel to contain the brightly glowing aluminum.
In the video below, I used the furnace to melt copper scrap. This worked quite well. I found that the time it takes to melt the metal is longer than what TKOR says in his video (this is probably because I used larger amounts). When molten, the copper had an amazingly shiny glowing orange surface. It looked absolutely terrific. I used my foundry sand and a new, shorter casting flask to cast a neat little Cu tile for my element collection. After some cleaning up, it turned out very well.Regrettably, after the copper melt, the furnace broke in half! There was only one crack, but it ran down the full furnace height, making it unsafe for use. I quickly turned the lid into a furnace and then used the broken furnace as the new lid. Once the swap was complete, I melted some iron/steel. It took about six minutes, and I should have gone longer, but the vice grip electrode holders were becoming too hot to hold, even with fireproof gloves. I tried to pour the molten iron into my Fe tile mold, but as I picked up the furnace, the radiant heat promptly burned me through the fireproof leather gloves! I only managed to get a tiny bit of iron into the mold, but I undoubtedly cast iron! For me, it was quite an achievement, given that I have only cast aluminum and copper until now. The rest of the iron froze in the furnace, so I will have to remelt it to get it out.I am quite pleased with the results (Cu tile, achievement of casting iron), except for the broken furnace and the failed iron pour. I learned a few good lessons from the experience:
- Cast in they daylight - the extreme light difference between the glowing iron and the evening darkness made it hard to see what I was doing when casting the iron.
- Friends are always helpful in building complicated projects
- Make some sort of handle for the electrode holders and the furnace - the heat that these parts radiate when casting iron is too much to safely handle, even with gloves
- Don't try to scrape leftover metal out of the furnace. This could have been the reason the furnace broke (or it could have been thermal shock).
Though it was difficult at times, I have enjoyed this project immensely. There are few things as satisfying as casting glowing orange streams of molten iron. :)
Experiment 31: Carbon Arc Light
This project was utterly, fantastically awesome! I was able to harness the crazy power of electricity to create an intensely bright arc light. Electric arcs are so bright that they can be used in anti-aircraft searchlights and so hot that they can be used to melt tungsten (highest melting point metal). Mine doesn't do either of those things... yet.
I used an old CNC power supply transformer that steps 120VAC down to 30VAC with a lot more amps. I hooked up its secondary coil to some carbon rods from carbon-zinc batteries and, using .22 caliber shells as electrode holders, adjusted the rods so that they touched. The resulting arc was so hot it warmed my hands from 6" away! Even though the arc itself was only ~2mm long, it was hot enough to melt copper and tin. It was also about as bright as burning magnesium, so I had to use welding goggles to protect my eyes. That being said, I had an extreme amount of fun with this little experiment. Check out the video to experience the awesomeness of raw electricity!
I used an old CNC power supply transformer that steps 120VAC down to 30VAC with a lot more amps. I hooked up its secondary coil to some carbon rods from carbon-zinc batteries and, using .22 caliber shells as electrode holders, adjusted the rods so that they touched. The resulting arc was so hot it warmed my hands from 6" away! Even though the arc itself was only ~2mm long, it was hot enough to melt copper and tin. It was also about as bright as burning magnesium, so I had to use welding goggles to protect my eyes. That being said, I had an extreme amount of fun with this little experiment. Check out the video to experience the awesomeness of raw electricity!
Experiment 29: Lost Foam Casting a Slingshot
After seeing some cool videos on lost foam casting and also becoming addicted to Joerg Sprave's videos on YouTube, I decided that I had to try this method of metal casting. I used some StyroFoam as my foam material to carve into a slingshot and then put it in sand for casting. After pouring, it turned out quite well! It has a few pits and imperfections, but it looks pretty awesome otherwise. Although its rubber doesn't perform very well in the wintry cold, it should be powerful enough for squirrel hunting in the spring and summer. I look forward to blasting some stuff to tiny bits as soon as it warms up!
Also, check out its Instructable for more detailed information! If you want to watch the pour, check out this video and this ingot casting video on my YouTube channel. I have included a few pictures of the casting session (I also cast a few nice-looking ingots in the same session):


Also, check out its Instructable for more detailed information! If you want to watch the pour, check out this video and this ingot casting video on my YouTube channel. I have included a few pictures of the casting session (I also cast a few nice-looking ingots in the same session):
Experiment 27: Key Duplicating by Casting
I have always wanted to give key copying a go like the secret agents do in spy movies, so I tried it using my house key. Before you freak out and say that key copying is illegal, note that I used my house key, which I own. Do not copy other people's keys. That is probably illegal and could be a felony.
Anyhow, I used some creative methods to quickly copy the key and cast it in zinc. After a bit of touching up, the casting actually worked! Check out the Instructable for pictures and more information! Also, if you don't believe me, watch this video of the test in my door:
Anyhow, I used some creative methods to quickly copy the key and cast it in zinc. After a bit of touching up, the casting actually worked! Check out the Instructable for pictures and more information! Also, if you don't believe me, watch this video of the test in my door:
Experiment 26: Field's Metal!
I have an intense fascination with metals in general, but especially with melting and casting them. I like melting metal because the metal turns into a liquid, and liquid metal is totally amazing! Obviously, I would favor liquid mercury for its superior density, shininess, surface tension, and melting point, but I am not permitted to obtain any, so I have been experimenting with substitutes. I got gallium, but gallium usually has a bunch of slag on top and doesn't have much surface tension, so I made Field's metal (and also expanded its Wikipedia page) - an alloy that melts at 144°F and has much more surface tension than gallium with a lot less slag. It is made of bismuth, tin, and indium, the latter of which is incredibly expensive. For that reason I couldn't get a lot of the alloy put together. However, to make what I do have, I weighed out the precise quantities based on the percent composition listed on the Wikipedia page and then melted them with a glass beaker and a propane torch. After I did this, the alloy melted nicely with just hot water! Below is a video I made of playing with my Fields' metal:

I really enjoy how easy it is to melt Field's metal. If I am not happy with how the casting turned out, I can just plop the ingot back in the water and it will melt almost instantaneously. Using this nice feature, I was able to quickly recast the Field's metal into a nicer ingot:
I am extremely happy with the Field's metal, although it isn't quite as nice as I am sure liquid mercury would be. I guess it will have to suffice. :)
Experiment 24: Gallium & Coins
A while ago, I carved a template pirate booty coin from some thin plywood using my woodcarving knife. Recently, I got gallium metal (wahoo!), so I decided to make a mold for the wooden template. I used plaster of paris and just poured it over the coin in a cardboard tube. After it had dried, I pried the wood coin out. It broke the mold a bit, so I had to do surgery with epoxy and superglue. Then, I melted the gallium in a double-boiler setup over my hotplate. I have found that the gallium tends to get a layer of slag on top if it is submerged in water. The gallium cast very easily when molten and stayed molten... and stayed... and stayed. Turns out, gallium has a (very strong) tendency to supercool, which means that the liquid will cool to below its melting point of 85°F and still be liquid. This property can be great, but it is very annoying if your gallium coin never freezes. To remedy the problem, I added a crystal of solid gallium. This seed crystal jumpstarted the freezing process and in a reasonable amount of time, the gallium froze. When tried to remove it from the clutches (notice foreshadowing) of the mold, the mold flatly refused to let go. In the end, the mold broke completely and the gallium pirate booty coin turned out great! I am very pleased with how the design turned out. Sadly, the coin met its end in a hot car on a sunny summer day (it was "experimentation"), but I plan to resurrect the pirate booty coins by making a new mold and being more careful.


Experiment 22: Cast Primative Slingshot Ammo
Recently, I have been quite fascinated with slingshots. They are so simple and yet, as seen on The Slingshot Channel, they are powerful beyond belief. Slingshots perform very well with lead balls or steel ball bearings for ammunition. I have none of the former and the latter are quite expensive. Thus, decided to make my own ammo! I used a drill press and some medium-density fiberboard to make a mold with two wooden dowels as a locking mechanism. it is pretty amazing what one can do with just a drill press. Then, I melted some of the same tin/lead/zinc alloy used in my Instructable from Experiment 19: Lost Wax Casting using the stove as a heat source and a tin can as a crucible. I also clamped the mold together with two woodworking clamps. It cast beautifully! The ammo aren't perfect spheres (due to drill bit shape and misalignment), but the alloy was soft, so I was able to cut off the sprue (seen in bottom left picture) with a pair of wire-cutters. After a few minutes, I was able to crank out eight really awesome slingshot balls! If I could get my hands on some pure lead, I could also make even denser, higher-performance ammunition, but I suppose these are cool enough for now. :)



Experiment 21: Sulfur Casting
After seeing Theodore Gray's sulfur fish casting, I decided that I wanted to try sulfur casting, too. Since sulfur melts at 240°F, it can be easily melted with a stove, campfire, or hot plate. I had previously tried melting the sulfur (I used plain garden sulfur) over the exhaust flame from my large aluminum furnace, but I overheated the sulfur a lot and it turned into some sort of tar substance. For my next attempt, I melted it using my hot plate (WAY less heat) with a tin can crucible (middle picture) and poured it into another tin can. It made a nice-looking disk with fascinating crystals visible on the surface. This has since broken, but I thought it was interesting enough to land it a spot in my element collection (I will be making a page about that shortly), Later, I also cast a sulfur cube using a wood fire for heat and a 1" section of aluminum box tube for a mold. When I poured the left-over molten sulfur into the fire, the liquid (which glows a dull red) caught fire and streamed into the flames with the coolest blue flame I have ever seen. I thought the sulfur looked amazing, a thin stream glowing both red and blue at the same time. In conclusion, sulfur is quite easy to melt and is amazingly fun to cast.


Experiment 20: Greensand Casting
This one's a special one - it's extra big and beautiful! In this experiment, I made a mold of a bowl using greensand, a type of sand used in the metalcasting industry for molding. Then, I poured a crucible full of molten aluminum into the mold and let it cool. After breaking the sand, I had an amazing aluminum bowl! The process was extremely fun and I am pleased with the results. Check out this experiment in more detail at Instructables: http://www.instructables.com/id/Cast-an-Aluminum-Bowl/
Experiment 19: Lost Wax Casting
Lost wax casting involves making a wax replica of what you want your final object to be. The wax is placed in plaster and then the plaster is heated, which melts all the wax out, leaving a void in the shape of your finished item. When molten metal is poured into the mold, it takes its final shape and cools, leaving you with a metal replica of the wax carving. Jewelers use this to make rings, so I decided to give it a try. Actually, I made an Instructable on this endeavor, and the Instructable got featured (yay!), so check it out! I am also happy to say that the ring turned out absolutely stunningly!
Experiment 17: Melting Metal in a Campfire
If you want to melt metal at home, but you don't want to go to the expense, hassle, and surprising manual labor required to build a complete furnace, this experiment is for you! You can easily and cheaply melt metal in a campfire at home or while camping! To do this experiment, I cut a soup can down to about 2" and then cut holes in the sides so that an iron bar I had could pass through. Then, I secured the can to the bar with a piece of thick copper wire. My can-on-a-stick crucible ready, I put in a quarter's worth of pennies dated after 1982 (these pennies have mostly zinc cores) and lit the completely regular campfire. No fanning, blowers, charcoal, or other extremes are needed to melt your very own metal in a campfire. While the fire was going, I made a mold by placing a 1 1/2" diameter brass pipe about 2" long on top of a large flat piece of stainless steel. The specific metals for these don't really matter; I just had them on hand. This setup provided a good way to create a circular ingot mold for the zinc, without messing around with sand, wood, or plaster of paris. Once the fire was going, I put my can-on-a-stick over the fire and let the pennies melt. They melted quite quickly, actually. When they were molten, I used a short strip of steel to scoop off the copper shells of the pennies, revealing the amazingly shiny liquid zinc underneath. I poured this in a smooth, swift motion into the brass pipe on the stainless steel and set everything aside to cool. Cooling is really important, because very hot metal looks just like cold metal (I have a burn on my finger to prove this). Once everything was cool, I knocked my new ingot out of the pipe. Success!
 The circular ingot blanks have a nice weighty feel and look very shiny to boot! Also, note that after some calculations, I figured out that I had a 70% efficiency with this process. Thus, 30% of the zinc metal I had in the pennies was wasted. Keep this in mind, and have fun!
Experiment 11: Ultra-Dangerous Mossy Lead/Tin Alloy
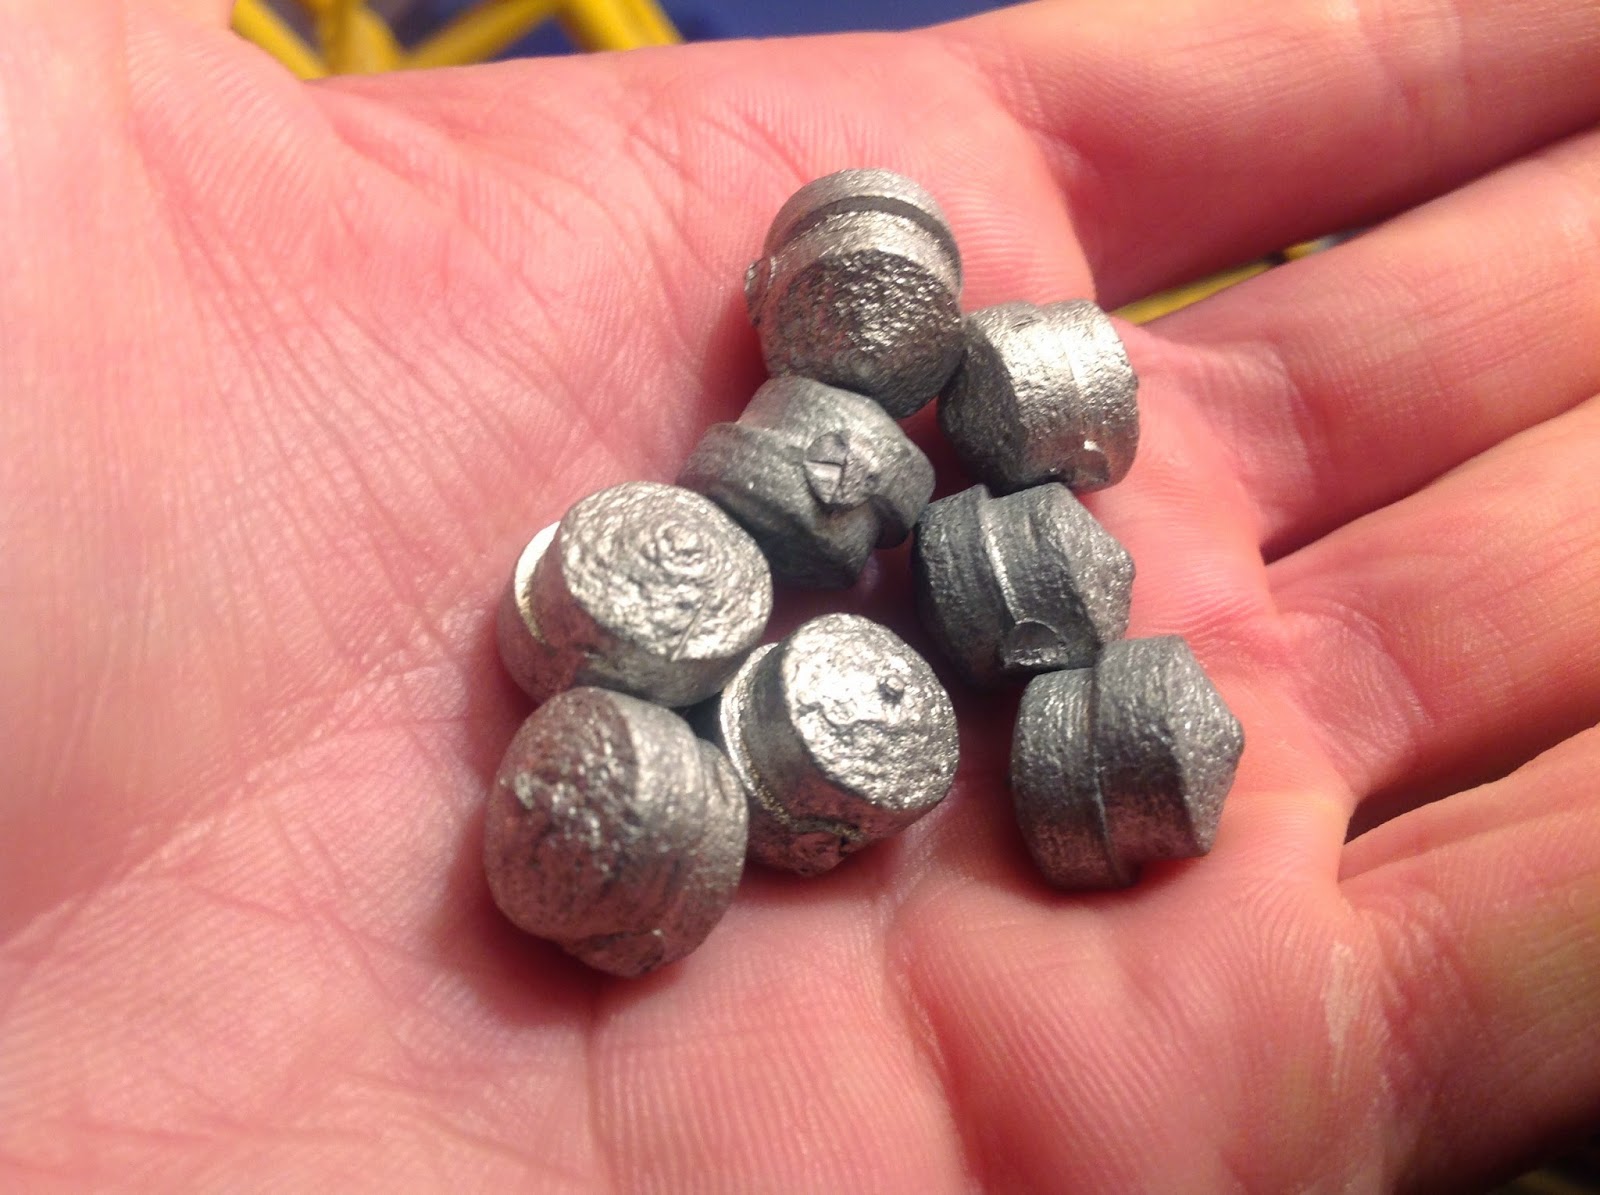
I had some 60/40 tin/lead solder that I decided to experiment on, so I first melted it into a nice blob. Pretty, hefty, and solid, but not super-exciting. So, I decided to try pouring the molten alloy into water, to see what would happen and to hopefully make nice granular pellets for science experiments. For those of you who don't know, "mossy" metal is what you get when you pour metal into water, so it makes really shiny oddly-shaped blobs. I poured a coffee bean can full of water and then melted my solder in a tin can with a propane torch. It melts quite easily. Then, I poured it into the water, trying to pour slowly and make the solder fall in little blobs. It worked pretty well:

As you can see, I got some really shiny mossy solder. I also got three weird "fuzzy" spheres of alloy, which brings me to an extremely important point: this is dangerous. I hypothesize that the fuzzy spheres are caused by a fairly large amount of molten (read: hot) tin/lead alloy exploding itself inside out while under water, kind of like popcorn. They are really quite thoroughly exploded. If this molten tin/lead mixture exploded onto your skin, eyes, or other important body parts, I can predict that you would not be happy. I was wearing splash goggles and full winter clothing, but leather gloves and a face shield would have been even better. Have fun, and be safe!
Experiment 3: Zinc Ring Casting
 So I have been interested in metal casting for a while and have made some blobs and large ingots, but I wanted some real results. I made some casting sand using 1 part ground cat litter (try to find one that only has Bentonite clay in it) to 9 parts regular play sand. I ground the cat litter using my mom's kitchen blender; if you do so, wash it out well or she will murder you with a butcher knife. I probably should have used fine silica sand, but play sand was what I had on hand from building my large metal-melting furnace. Regular play sand will give you coarse results. I added enough water so that it stuck together but was not sopping. I then basically followed this, but I did not add any vents/air holes for the casting. My flasks were made by cutting a frozen juice can in half; you can definitely improve this if you do this experiment. Having made my ring mold (using my dad's wedding ring), I used a soup can as a crucible and a propane torch to melt some zinc pennies (date after 1982) and skimmed off the copper coating. With a smooth action, I poured the metal into the mold. I am exceedingly happy with the results.

The image at the top of the post is the newly removed casting. I cleaned it up with a Dremel tool and a hand file and then sanded it smooth. As you can see from the two other pictures, the ring actually resembles a real ring and looks fairly nice for a first casting. It even fits on a finger and does not irritate the wearer!
Subscribe to:
Posts (Atom)